Table of Contents
ToggleWater pooling at the bottom of your GE dishwasher? That’s often a sign your drain hose needs attention. The drain hose is a simple but critical component, it’s responsible for pushing dirty water out of the tub and into your home’s drain line. When it fails, you’re left with standing water, odors, and potential damage to your kitchen. The good news is that most GE dishwasher drain hose problems are preventable with basic maintenance, and many repairs are straightforward DIY jobs. This guide walks you through identifying common issues, keeping your hose clean, and knowing when replacement is necessary.
Key Takeaways
- A GE dishwasher drain hose is a critical component that prevents water backup and potential mold growth; clogged or damaged hoses can lead to standing water, odors, and kitchen water damage.
- The most common GE dishwasher drain hose problems are clogs from food particles and mineral buildup, especially at connection points, which can be cleared with hot water flushing or a plumbing snake.
- Regular maintenance—including monthly garbage disposal cleaning and bi-monthly vinegar rinses—extends drain hose life by 5–10 years and prevents costly repairs.
- If cleaning doesn’t restore drainage or you spot cracks and persistent leaks, replacement is the safest solution; new hoses cost $15–50 and installation takes 15–30 minutes.
- Always unplug the dishwasher before accessing the drain hose, and check local plumbing codes before installation to ensure warranty protection and compliance.
Why Your GE Dishwasher Drain Hose Matters
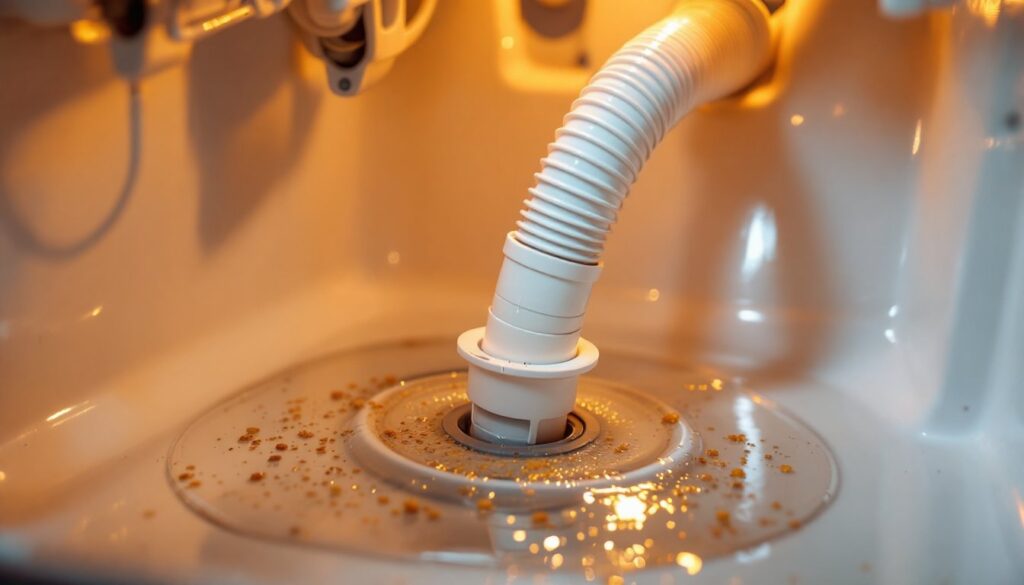
Your GE dishwasher’s drain hose is essentially a flexible tube, typically 5/8 inch (nominal diameter) in cross-section, that connects the dishwasher’s drain pump outlet to your sink drain or garbage disposal. During the wash cycle, the pump pushes water through this hose and out of the appliance. If the hose becomes blocked, kinked, or damaged, water backs up into the tub instead of draining.
A properly functioning drain hose is what stands between a clean kitchen and a soggy mess. Water left sitting in the dishwasher breeds bacteria and mold, leading to foul odors and potential mold growth inside the machine itself. Beyond cleanliness, a failed hose can cause water damage to cabinets and flooring if leaks go unnoticed. Unlike the spray arms or filter, parts you see regularly, the drain hose works silently in the background. That’s precisely why homeowners often overlook it until something goes wrong.
Common Drain Hose Issues and Warning Signs
Clogs and Blockages
The most common problem is a clogged drain hose. Food particles, grease, and mineral buildup accumulate inside the tube over time. You’ll notice water draining slowly or not at all, or the dishwasher stopping mid-cycle and displaying an error code. A minor blockage might let some water through: a severe one traps water completely.
Clogging happens most often where the hose connects to the sink drain or garbage disposal. If you have a garbage disposal, make sure its drain opening isn’t blocked, a clogged disposal creates a dead end for dishwasher water. According to detailed guides on clearing a clogged dishwasher, the hose connection point is a prime suspect during troubleshooting.
Cracks, Leaks, and Wear
Over time, drain hoses develop cracks or tiny punctures. These often occur where the hose bends or rubs against a cabinet edge or sharp fitting. You might notice water dripping inside the cabinet beneath the dishwasher, or moisture around the connection points. Some leaks are pinhole-sized and easy to miss until damage spreads.
The hose material, typically reinforced vinyl or rubber, degrades with age and heat exposure. Most hoses last 5–10 years, depending on usage and water chemistry. Hard water with high mineral content can accelerate wear on internal hose surfaces.
How to Clean and Maintain Your Drain Hose
Regular maintenance catches problems early and extends hose life. Here’s a practical approach homeowners can take.
Safety first: Before accessing the drain hose, unplug the dishwasher or switch off its circuit breaker. Water remaining in the lines can spill when you disconnect components.
Step 1: Locate the drain hose. Open the cabinet beneath your GE dishwasher and trace the hose from the unit outlet to where it connects to your sink drain or garbage disposal. Most hoses are held in place with hose clamps at each end.
Step 2: Check for visible blockages. Look at both ends of the hose and at any low points in its run. If you see standing water or debris inside, that’s your clog.
Step 3: Disconnect and flush the hose. Using a screwdriver, loosen the hose clamps at both connection points. Carefully pull the hose free, be ready for water to spill into a bucket. Hold the hose over a sink and run hot water through it from both directions. For stubborn blockages, use a plumbing snake or even a straightened wire coat hanger, gently pushing through to break up debris.
Step 4: Clean the connections. Where the hose connects to the dishwasher and sink drain, wipe away grease and mineral deposits with an old cloth or soft brush. These areas are common trap points.
Step 5: Reinstall and secure. Slide the hose back into place and tighten the hose clamps firmly but not excessively, over-tightening can crack the hose where the clamp sits.
Ongoing maintenance: Run hot water through your sink drain regularly. Clean your garbage disposal monthly. Consider running an empty dishwasher with a cup of white vinegar in the wash basin every other month to dissolve mineral buildup inside the entire system, including the hose.
When to Replace Your GE Dishwasher Drain Hose
If cleaning doesn’t restore normal drainage, or if you spot cracks, holes, or persistent leaks, replacement is necessary. A damaged hose won’t hold together with tape or patches, water pressure will eventually fail any temporary fix.
Replacement parts for GE dishwashers are affordable. Most drain hoses cost between $15 and $50 depending on hose length and whether you need a pre-assembled kit with clamps. Check your GE dishwasher’s manual or model number (usually found inside the door edge or on a label inside the tub rim) to order the correct replacement.
The replacement process is straightforward. Unplug the dishwasher, locate the hose connections, loosen the clamps, disconnect the old hose, and slide the new one in place. Tighten the clamps, plug the unit back in, and run a short test cycle to confirm drainage. The entire job takes 15–30 minutes for most homeowners.
If the hose is kinked or bent sharply against a cabinet edge, you might be able to reposition it to reduce wear. But, if kinking is unavoidable due to space constraints, supporting the hose with a rubber hose guide or foam insulation can extend its life. Professional dishwasher repair guides often recommend this preventive approach.
When to call a professional: If water is leaking inside the dishwasher cabinet itself (not just from the hose connection), or if the drain pump sounds unusual, the problem may lie elsewhere. Likewise, if your dishwasher is under warranty, contacting GE support before attempting repairs protects your coverage. Some municipalities also require licensed plumbers to install certain appliance drain connections, check local codes.
Conclusion
A healthy drain hose keeps your GE dishwasher running quietly and your kitchen dry. Most problems stem from preventable clogs or gradual wear, both of which respond well to proactive maintenance or straightforward replacement. By understanding how the hose works, spotting warning signs early, and cleaning it regularly, homeowners can avoid costly water damage and appliance downtime. When replacement becomes necessary, the job is well within reach for anyone comfortable with basic tools and a bucket.