Table of Contents
ToggleA cluttered workshop kills productivity. You can’t find the screwdriver you need, projects take twice as long, and tools get damaged from careless stacking. Smart tool storage and organization isn’t just about aesthetics, it’s about making your DIY work safer, faster, and more enjoyable. Whether you’re storing hand tools, power tools, or a mix of both, the right system turns chaos into a functional workspace. This guide walks you through assessing what you own, choosing the right storage solutions, and maintaining a system that actually works.
Key Takeaways
- Proper tool storage and organization extends tool life, prevents safety hazards, and eliminates time wasted hunting for equipment on DIY projects.
- Assess your complete tool collection by category and size before purchasing storage solutions to ensure you choose a system that matches your actual workshop needs.
- Wall-mounted pegboard systems and magnetic strips provide flexible, space-efficient tool storage for smaller workshops, costing $25–40 for a 4-by-8-foot sheet plus accessories.
- Toolboxes, cabinets, and drawer dividers with organized socket trays prevent tools from getting damaged or lost, while keeping frequently used items within arm’s reach.
- Label all storage compartments with a label maker and maintain a simple inventory spreadsheet to reduce time spent searching and prevent accidental duplicate purchases.
- Consistent tool maintenance—including quarterly cleaning, moisture control, and placing every tool back in its designated home—ensures your storage system delivers long-term benefits to your DIY work.
Why Proper Tool Storage Matters for Your DIY Projects
A disorganized tool collection wastes time and money. You spend 10 minutes hunting for a hammer when you should be hanging drywall. Duplicate purchases happen because you forgot you already owned that tool. Worse, loose tools get damaged, a sharp chisel left face-down gets dulled, and wooden handles crack when piled under weight.
Proper storage extends tool life. Hand tools like chisels, saws, and planes need protection from moisture and impact. Power tools deserve dust covers and secure placement away from moisture in your workshop. A structured system also keeps you safer: tripping on loose tools is a genuine injury risk, and knowing exactly where your sharp objects are prevents accidental cuts.
Beyond safety and preservation, organization saves money. When you can see what you own, you don’t buy duplicates. You also work faster because you’re not wasting energy on the hunt. Projects flow smoother when the right tool is literally arm’s reach away. The time you invest setting up a storage system pays dividends on every single project you tackle.
Assess Your Tool Collection Before Organizing
Before buying storage solutions, know what you’re actually storing. Pull everything out of the garage, your truck, and that junk drawer where tools mysteriously accumulate. Sort into categories: hand tools (hammers, screwdrivers, wrenches), measuring and marking tools (tape measures, levels, squares), power tools (drill-drivers, saws, sanders), fasteners and consumables (screws, nails, sandpaper), and specialty items.
Note the size and shape of each tool. A claw hammer needs different space than a rubber mallet. A 20-volt drill-driver occupies more room than a set of screwdrivers. Tools with loose parts, like socket sets or wrench collections, need contained storage so nothing gets lost.
Count your tools roughly. Are you a casual DIYer with maybe 30 hand tools, or are you building a serious workshop? A hobbyist generally needs 80–150 square inches of wall space or a solid toolbox. A serious woodworker might need 3–5 times that. Be realistic about what you actually use versus what you’ve been keeping “just in case.” Donation or resale of unused tools frees up storage and funds better solutions. This assessment shapes every storage choice that follows.
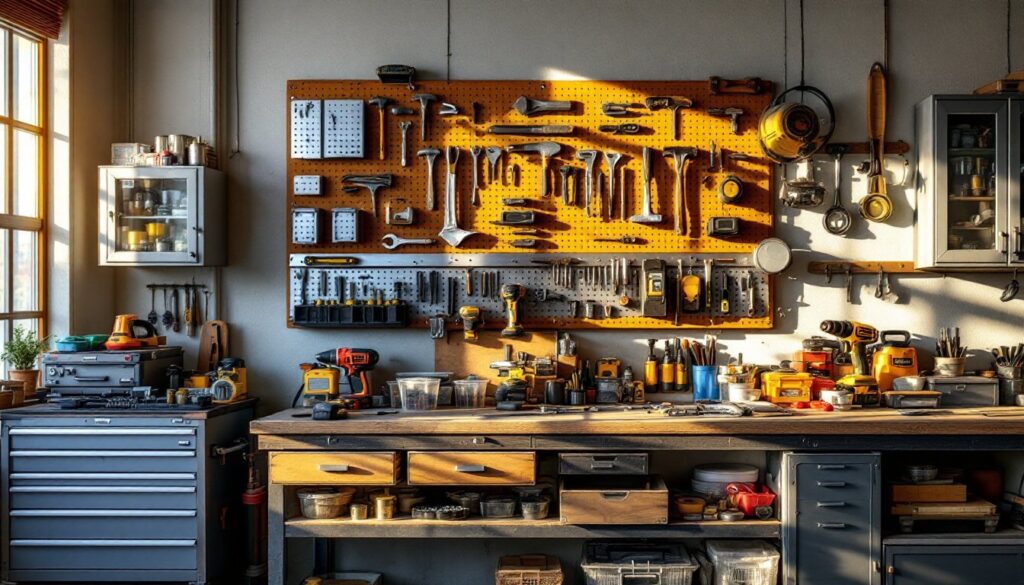
Wall-Mounted Storage Solutions That Save Space
Wall-mounted storage is a game-changer in smaller workshops. It uses vertical space, keeps tools visible and accessible, and makes your work area look organized rather than cramped. The most versatile option is the pegboard system, which uses a perforated hardboard backing mounted to wall studs with 5/8-inch spacing between holes. Hooks, baskets, and shelves plug into holes, letting you configure storage exactly how you work.
Choose 1/4-inch-thick pegboard for standard home workshops: thicker versions are overkill for most DIY collections. Mount pegboard 16 or 24 inches from studs to ensure solid backing. Leave at least 2 inches clearance from the wall so hooks and pegs can lock in fully. A single 4-by-8-foot sheet costs roughly $25–40 and holds 50+ tools depending on hook selection. Paint or stain pegboard beforehand: painting after installation is messy.
Pegboard Systems and Magnetic Strips
Magnetic strips complement pegboards beautifully for metal hand tools. A 16-inch magnetic strip costs $10–20 and holds drill bits, chisels, small wrenches, and screwdrivers without needing hooks. Mount strips horizontally above your work surface for easy grabbing. Keep magnetic strips away from power tools, the magnet won’t damage electronics, but you don’t want loose metal flying around when a circular saw is running.
Combining pegboard with magnetic strips and labeled hooks creates a flexible, scalable system. As your collection grows, add more strips or adjust hook positions. This flexibility beats rigid cabinets for someone still building their tool collection.
Toolboxes, Cabinets, and Drawer Organization
Toolboxes work best for portable tool collection or secondary storage. A 5-tray steel toolbox (roughly 16 by 8 inches) holds hand tools and costs $30–60. Metal trays won’t deteriorate, and the locking lid protects contents from dust. Larger wheeled tool chests (36 by 18 by 36 inches) hold 200+ items and roll around the workshop, perfect if you’re moving between projects in different areas. These run $200–500 depending on drawer quality and material.
For permanent workshop storage, wall-mounted cabinets use vertical space efficiently. Shallow cabinets (6–12 inches deep) work for hand tools, while deeper ones (18–24 inches) suit power tools and larger items. Mount cabinets 36–48 inches from the floor for comfortable reach. Metal cabinets resist humidity better than wood in garages: if using wood, ensure good ventilation and consider a dehumidifier in damp climates.
Drawer dividers keep smaller tools from rolling around and getting lost. Plastic or wood dividers cost $5–15 per drawer and prevent the dreaded “tool soup” where everything mingles together. For socket sets, use organized socket trays with labeled slots for each size, saves hunting and prevents lost 10mm sockets (the most famous casualty in any toolbox). A Home Organization Planner can help you map drawer layouts before building.
Labeling and Maintenance Systems for Long-Term Success
Labels turn storage from organized to functional. Use a label maker (Brother P-touch models run $25–35) to print consistent labels on drawers, bins, and pegboard hook zones. “Drill bits, 3/32 to 1/4 inch” beats a generic “bits” label that confuses you six months later. Label everything: it takes 10 extra minutes now and saves 100s of minutes hunting later.
Add a simple tool inventory spreadsheet, just tool name, location, and purchase date. When something goes missing, you know where it should be. For valuable items or specialty tools, note their replacement cost: this protects against future gaps in your collection.
Maintenance prevents storage failure. Once quarterly, wipe down pegboard and shelves to keep dust off tools and visible. Check tool handles for cracks and blades for rust or dullness. A thin coat of machine oil on metal surfaces prevents corrosion in humid environments. Keep moisture control in mind: if your garage gets damp, place a small dehumidifier near your storage to protect hand tools from rust. Store power tools with batteries removed when not in use, batteries drain slowly and can leak if left in tools for months.
Your system only works if you put tools back consistently. Designate a “home” for every tool so returning items becomes automatic. This discipline, more than any fancy storage solution, keeps your workshop running smoothly. Resources like Popular Mechanics offer detailed maintenance guides for specific tool types if rust or damage becomes an issue.
Conclusion
Tool storage done right transforms your workshop from frustrating to functional. Start by assessing what you own, then pick solutions that match your space and collection size. Wall-mounted systems save space: toolboxes offer portability: cabinets maximize vertical real estate. Label everything, maintain your tools, and keep them in designated spots. A well-organized workshop doesn’t just feel better, it makes you a faster, safer, and happier DIYer.