Table of Contents
ToggleDenver’s hard water is notorious, mineral-heavy tap water leaves film on dishes, shortens appliance lifespans, and turns your shower into a skin irritant. If you’ve noticed stiff laundry, spotty glassware, or buildup in your pipes, a water softener installation might be exactly what your home needs. This guide walks you through understanding whether you need one, what types work best for Denver homes, and how to decide between DIY installation and calling in a pro.
Key Takeaways
- Denver’s hard water averages 120–150 ppm, well above safe levels, causing mineral buildup that reduces appliance efficiency by up to 15% and shortens equipment lifespan.
- Water softener installation in Denver is best accomplished with ion exchange softeners, which are affordable ($300–$800), reliable, and effectively handle the region’s aggressive mineral content.
- DIY water softener installation can save $500–$800 in labor but requires 4–6 hours, basic plumbing knowledge, and strict adherence to proper bypass valve and drain line setup to avoid leaks.
- Professional installation is essential if your main water line runs under concrete, uses soldered copper connections, or requires permits—costs range from $300–$800 in labor plus the unit price.
- Regular maintenance—including monthly salt refills, quarterly leak inspections, and annual professional check-ups—keeps your water softener system running efficiently and prevents costly repairs.
Why Denver Homeowners Need Water Softeners
Denver sits on the Colorado Plateau, where water naturally absorbs calcium and magnesium from limestone and sandstone aquifers. The result: Denver’s water hardness averages 120–150 ppm (parts per million), well above the 60 ppm threshold the USGS considers “hard.” That doesn’t sound dramatic until your pipes start corroding, your water heater runs 15% less efficiently, and you’re buying extra soap to feel clean.
Hard water doesn’t pose health risks for drinking, but it does wreak havoc on plumbing, appliances, and your wallet. Mineral scale buildup in water heaters, dishwashers, and washing machines forces them to work harder and fail sooner. Softeners reduce these deposits, extending equipment life by years and cutting energy costs.
Signs You Have Hard Water Problems
You don’t need a lab test to spot hard water, your bathroom and laundry room will tell you. Look for these telltale signs:
- Soap residue and dull skin: Hard water prevents soap from rinsing completely, leaving a sticky film on skin and hair.
- Spotty dishes and glassware: Calcium and magnesium deposits cling to dishes after washing, creating cloudy spots that won’t buff away.
- Stiff, faded laundry: Mineral deposits lock into fabric fibers, making clothes feel rough and colors fade faster.
- Reduced water pressure: Scale buildup inside showerheads and faucet aerators narrows water passages over time.
- Visible scale on fixtures: White, chalky crust around tap spouts and inside kettles is pure mineral accumulation.
- Soap scum in the tub: Bathtub rings and stubborn soap residue cling longer in hard water.
If you’re seeing three or more of these, your Denver home is a prime candidate for a water softener system. A simple water hardness test kit (under $10 at hardware stores) confirms the diagnosis before you invest in equipment.
Types of Water Softeners for Denver Homes
Not all water softeners work the same way, and Denver’s high altitude (5,280 feet) and mineral composition call for the right fit. Here are the main types homeowners choose:
Ion Exchange Softeners are the workhorses of the industry. Resin beads inside a tank trade sodium or potassium ions for calcium and magnesium. When the resin gets saturated, a regeneration cycle uses salt brine to flush the tank and restore the resin. Most Denver homes use this type because it’s reliable, affordable ($300–$800 for the unit), and handles high mineral loads. The trade-off: you’ll need to refill salt pellets every 6–8 weeks, and the system requires a drain line for backwash water.
Salt-Free Softeners use crystallization or magnetic fields to prevent scale without removing minerals from the water. They’re lower-maintenance (no salt to refill) and cost $400–$600, but they don’t fully soften water, they just reduce scale buildup. Denver’s aggressive mineral content means salt-free systems work best as a secondary filter or for spot applications (like protecting a water heater), not as a whole-house solution.
Reverse Osmosis (RO) Systems filter water at the molecular level, removing 95% of dissolved minerals. They’re excellent for drinking water but impractical for whole-house use due to slow flow rates and water waste (they use 3–4 gallons to produce 1 gallon of clean water). Most Denver homes reserve RO for a single tap or undersink filter, pairing it with a main-line softener.
Dual-Tank Softeners have two resin tanks so one regenerates while the other serves your home, zero downtime for water flow. They cost roughly twice as much ($1,500–$2,500 installed) but suit homes with high water usage or those who can’t tolerate pressure drops during regeneration cycles.
For most Denver homeowners, an ion exchange softener is the sweet spot: affordable, proven, and handles the region’s mineral-heavy water effectively. Water softener systems Denver businesses and residents alike rely on these units because they’re durable and perform in the region’s altitude and hard-water environment.
DIY Water Softener Installation Steps
If you’re confident with plumbing basics and your softener comes with clear instructions, DIY installation can save $500–$800 in labor. But, this isn’t a weekend project if you’ve never touched your main water line, plan for 4–6 hours and have a helper on speed dial.
What You’ll Need:
- Adjustable wrench (two sizes) and Teflon tape
- Bucket and towels for catching water
- Hacksaw or tubing cutter (if cutting copper or PVC lines)
- Elbows, unions, and adapters to fit your existing plumbing
- Bypass valve kit (included with most softeners)
- Drain hose (usually 3/4-inch diameter)
- Safety glasses and work gloves
Step-by-Step Installation:
-
Turn off the main water supply at the shutoff valve (usually near your meter or where the line enters the house). Open a nearby faucet to release pressure in the lines.
-
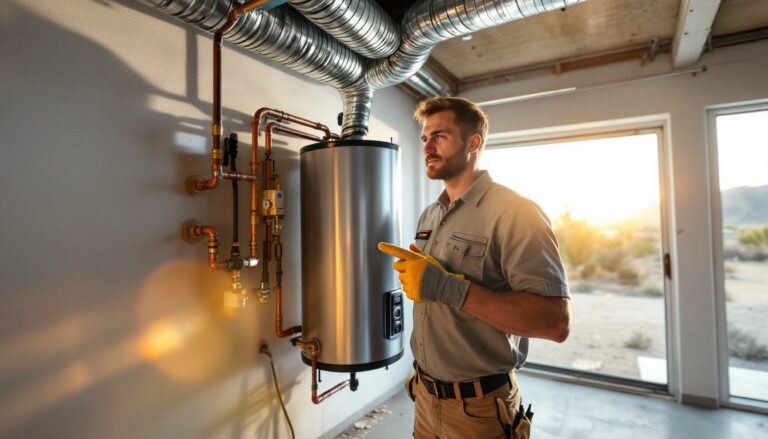
Locate the main line. Your softener must sit on the line where all water entering the home passes through it. This is typically in the utility room, basement, or garage, never upstairs or in a finished space where leaks could cause water damage.
-
Cut and fit the bypass valve. The bypass lets you shut off the softener without stopping household water. Cut the main line just below the shutoff, then install the three-valve bypass assembly (input, output, and bypass valve). Use Teflon tape on all threaded connections, wrap it clockwise five times around the male thread to prevent leaks.
-
Install the softener tank. Position it level on a concrete pad or stable floor with at least 2 inches of clearance on all sides for salt refilling and maintenance. Connect the input line from the bypass to the softener’s inlet, and the outlet to your home’s cold water line.
-
Attach the drain line. Run the 3/4-inch drain hose from the softener’s overflow to a nearby floor drain, basement sink, or utility drain. The line can slope gently downward but must not connect to a pressurized drain system, gravity drainage only.
-
Install the brine tank. Place it on a level surface near the softener (within 10 feet of the resin tank). Connect the brine line (thin tubing) from the softener to the brine tank’s pickup tube. This line siphons salt brine during regeneration cycles.
-
Check all connections. Turn the main water supply back on slowly. Watch for leaks at every joint for 10 minutes. If you spot drips, tighten the coupling slightly (don’t over-torque, you risk cracking fittings) or reapply Teflon tape and retighten.
-
Program the softener. Most models let you set the hardness level (test your water if you haven’t), regeneration frequency, and time of day (usually 2–4 a.m. to avoid peak usage). Refer to your unit’s manual, every brand differs.
Critical Safety Notes:
- If your main line is copper and you’re cutting it, use a copper tubing cutter (not a hacksaw) for a clean, burr-free edge.
- Hard water softener companies Denver service often see botched DIY jobs because homeowners overtightened brass fittings and cracked them. Hand-tight plus one-quarter turn is the rule.
- If your home has a water pressure tank (common in older Denver properties), consult your manual to ensure the softener doesn’t disrupt its function.
Many homeowners successfully install their own systems by following the manual precisely. But, if your main line is under the concrete slab, requires soldering, or you’re unsure about code compliance, this is where professionals earn their fee.
When to Call a Professional Installer
Some installations demand professional hands. Know the red flags:
Complex Plumbing Layouts: If your main water line runs under your house in concrete, inside walls, or involves multiple turns and obstacles, cutting and rerouting it safely requires experience. A leak inside your walls costs thousands to fix.
Soldered Copper Connections: Sweating copper fittings (joining them with solder and a torch) looks simple but fails easily if you overheat the joint or use too much heat. Water leaks at soldered joints often appear weeks later. If your home’s plumbing is soldered copper, a plumber’s investment pays back immediately through reliability.
Local Permits and Inspections: Denver requires permits for water softener installation in many neighborhoods, especially in areas with HOA oversight or where main-line work triggers code inspection. A professional installer knows the requirements for your specific area and handles permit paperwork. Check with your city’s building department or HOA before starting, doing unpermitted work can create liability if something goes wrong or when you sell.
Water Treatment Already Installed: If your home already has a filtration system, reverse osmosis unit, or water pressure tank, adding a softener requires careful integration to avoid conflicts. A pro ensures the new system plays nicely with existing equipment.
No Drains Nearby: If your softener must sit far from a floor drain, running a long drain line requires a pump-assisted drainage system (adds $200–$400). Professionals handle this without kinks or low spots that trap water.
Costs for professional installation typically run $300–$800 in labor, plus the unit price. Water softener companies Denver residents trust, like locally licensed plumbers, also handle warranty registration and provide service callbacks if something misfires. That peace of mind is worth the cost for many homeowners, especially if plumbing isn’t your strong suit.
For estimated pricing, how much water softeners cost in Denver varies by system type and whether you DIY or hire professionals. Tools like HomeAdvisor let you get multiple quotes and compare contractor reviews in your area.
Maintenance Tips After Installation
A newly installed water softener isn’t a “set it and forget it” system. Regular care keeps it running efficiently and prevents expensive repairs.
Salt Pellet Refills: Check the brine tank monthly, it should hold 3–4 inches of water and a supply of rock salt or evaporated salt pellets (never table salt: it clogs the system). Most Denver homes refill every 6–8 weeks depending on hardness and water use. A 40-pound bag costs $5–$8 at hardware stores or big-box retailers.
Regeneration Cycles: Let your softener regenerate on schedule, usually overnight or early morning when water demand is lowest. If you need to delay regeneration (say, you’re away for a week), many units let you skip a cycle manually. But, if you delay too long without water flowing through it, the resin may calcify and lose effectiveness.
Monitor Water Softness: After 3–4 weeks, water should feel slippery (a sign soap is rinsing completely) and dishes should dry spot-free. If hardness returns before the next regeneration cycle, your settings may need adjustment. Most units display remaining capacity: check the control panel monthly.
Inspect for Leaks: Every few months, look under the softener and around connections for small puddles or mineral stains (white crusty deposits). Tighten any weeping connections gently, don’t crack fittings. If the tank itself leaks, replacement costs $800–$2,000, so address small drips immediately.
Annual Professional Check-Up: Even if you installed the softener yourself, homeowner maintenance checklists often recommend annual servicing by a pro. They test water hardness after softening, check resin condition, clean brine tanks, and spot problems early. Most plumbers charge $100–$200 for a service visit and catch issues that DIYers miss.
Resin Tank Cleaning: After 5–10 years, sediment or iron accumulation may clog the resin bed. A professional resin cleaning ($150–$300) flushes contaminants and restores flow rate. You’ll notice lower water pressure if this is needed.
Power Considerations: If your softener runs on batteries or has a backup battery for regeneration timing, replace them every 2–3 years to prevent the system from falling out of sync during outages.
Conclusion
Water softener installation in Denver transforms your home’s water quality and extends appliance life, but only if done right. Whether you tackle it yourself or hire a pro, the key is understanding hard water’s impact, choosing the right system for Denver’s mineral-heavy supply, and committing to basic maintenance. Start with a water hardness test, confirm local permit requirements, and don’t skip the drain line or bypass valve. Your future self will thank you when your water heater lasts 15 years instead of 8, and your shower feels like an actual luxury.